The Best Way to Remove Old Shower Tile
Sam Lutz • September 29, 2015
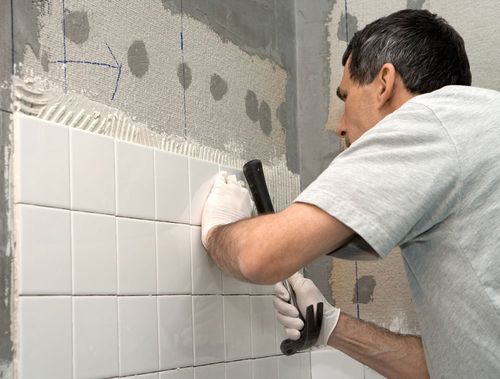
Bathroom remodeling projects (the big ones) often involve the removal of bathroom tiles. Whether you’re removing old shower tile to paint a wall, install a shower surround or install new tile, we’re posting this step-by-step tutorial to help you get started with the process.
Tools You’ll Need:
- Tarp (Maybe Several)
- Painter’s Tape
- Screwdriver
- Safety Glasses
- Utility Knife
- Chisel
- Hammer or Mallet
- Paint Scraper
Process:
- Lay down a tarp in the bottom of the bathtub or shower. If desired, use painter’s tape to secure the tarp to the walls of the shower.
- Turn off your water, then remove all fixtures from the walls, including the faucet, shower head, and hot and cold handles.
The shower head is easy to remove by simply unscrewing it from the pipe. The other fixtures will probably require the use of a screwdriver, although every model is different. Screws on faucet fixtures can appear behind hot/cold plates and on the underside of the fixtures. Faucet handles can be a challenge to remove because they can become fused with the faucet stems over the course of many years. If you’re having a hard time getting the faucet handles off of the stems, you can use a tool called a faucet extractor
to remove it. Or, you can devise a different system to remove the faucet handles, like this DIYer:
https://www.youtube.com/watch?v=-6L_xF1CiQ0 - Score around the tiles with a utility knife. To do this, dig the utility knife into the grout. This will help you take out the tiles without breaking them. The less destruction you create during this process, the better. If you’re careful, you may even be able to save the cement backerboard behind the tile, which would save you time and trouble as you proceed with your renovation.
- Hold the chisel along the grout line at an angle to the tile, then gently hammer the chisel in underneath the first tile. Move the chisel along the edge of the first piece of tile and gently hammer the chisel in all the way around until you’ve made a full circuit of the tile.
- Slip a paint scraper under the first tile and tap it with the hammer until the tile pries away from the wall.
- Continue steps 4 and 5 until all the tile has been removed.
During this process, the backerboard may become damaged. If this happens, you’ll have to tear down the old backerboard and replace it with new backerboard. Use a hammer to tear through the old backerboard. For pieces that have been screwed into the studs underneath, use a reciprocating saw to remove the old screws.
For more information about this process, and for pictures, check out this helpful tutorial.
Good luck! If you’re in the middle of a bathroom remodel and need some new furniture or paint colors, stop in at Ace Paint and Unfinished Furniture. We can provide you with materials you’ll need to make your bathroom look beautiful.

There are all kinds of wooden furniture: modern, antique and everything in between. We’ve talked about style differences, but what about how it’s made and what it’s made of? Is there a large difference between the wood furniture of today and yesterday?

Colors are so fascinating. They make us feel, they help us express how we feel. The right colors can really set the mood in a room, or on an outfit. There’s a lot to color theory and what each of the colors mean. This St. Patrick’s Day we thought it’d be fun to explore a little about green.

One of the wonderful things about good wood furniture is that it doesn’t have to be merely functional. It can be beautiful as well. We’ve seen some amazing pieces made with wood stains that are more than just furniture, they’re works of art. So if you’ve got an old table, desk or other piece of wood furniture that needs jazzed up, why don’t you consider using some of our great stains to try one of these ideas.

What's your furniture style? Here’s a few of the more popular styles and the kind of look they give your home.

Wood is our most basic raw material used for creating furniture. Wood furniture is timeless, and the aesthetic options are endless. Let’s talk about a few today, shall we?

The 2010s saw an uptick in modern interiors, bringing in clean lines to decor and furniture, so what does the new decade have in store? Restyle your home for the new year with the latest trends.

Are they bright and bold? Wild and wacky? It’s a thrill for our industry to learn what the latest “in” colors will be each year, and they never disappoint. The color trends for 2020 include shades of green, blue and pink, and each have an inherent welcoming quality.

Holiday parties are part of the magic of the season, but the cleanup is a pain—especially when furniture is involved. Prevent disasters with a few tips on how to protect your furniture during holiday parties.

The holiday season has arrived, and soon every corner will be decked out in red and green. But have you ever stopped to think about what holiday colors mean?

Restaining an old piece of furniture with a new varnish color can go a long way, but first you need to remove the old stain color.