Techniques To Perfect Woodgraining
Sam Lutz • January 26, 2016
Wood Graining is the process of painting a mock wood grain pattern on a panel that has been primed and prepped. With little effort and the right tools, this amazing faux painting technique allows you to turn a flat, bland panel into a beautiful wood surface.
Gather Your Materials
- Tarp or Newspaper
- Primer
- Acrylic Base Coat Paint
- Fine-Grain Sandpaper
- Water-Based Glaze
- Acrylic Topcoat Paint
- Paint Roller
- Wood Grain Tool
- Hand-Held Straw Broom
- Paintbrush
- Varnish
Process
- Lay down a tarp or newspaper to protect your workspace.
- Prime the surface of the panel. Use primer formulated to adhere to the type of material being painted.
- Paint the panel with base coat. The base coat is the underlying color of the wood. This will be a lighter color than the final surface of the wood, so if your wood panel is going to be a medium orange-brown, then the base coat will be a light orange-brown about three or four shades lighter than the topcoat.
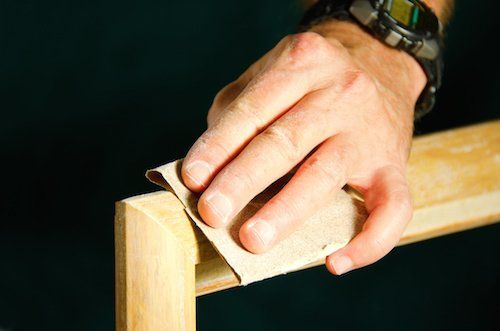
- Lightly sand the surface of the panel after the base coat has dried.
- Mix equal parts glaze, topcoat paint and water. The topcoat will be the color of wood, so pick a color that matches your expectations for the final appearance of the wood grain.
- Use a roller to paint the board with the mixture that you created in step 5. Use the roller to smooth out the paint so that it is evenly applied over the base coat.
- Press the wood grain tool into the wet paint. Starting in the upper left-hand corner of the board, drag the wood grain tool down. You’ll see a wood grain image develop in the wet topcoat, with the base coat showing through in places.
- Use the hand-held straw broom to brush lightly over the glaze, moving in the direction of the wood grain. Do this to rough up the glaze just enough that it looks as if there are tiny grains coursing through the grains you made in step 7.
- Wait for the paint to completely dry.
- Use the paint roller to paint over the panel with a final layer of topcoat. The topcoat should be transparent, so all the wood grain beneath should remain visible. If the topcoat is too dark, lighten it further by mixing it with more water and glaze.
- Protect the paint by painting a clear varnish over the panel when the paint has all dried.
Tips
- This process takes practice. When you’re doing it for the first time, practice the technique on a piece of scrap board before painting as a part of a larger project.
- Have some extra materials on hand, incase you decide to improvise. Extra paintbrushes, painter’s tape, and extra shades of brown paint may all come in handy.
- To achieve a warmer wood, mix a little orange, yellow or red into the brown. To achieve a more ashen wood, mix white with the brown and avoid using warm colors.
Resources
There are a variety of tutorials online
that show you the details of this technique. We recommend watching the YouTube video below, which clearly details the process.
For all your painting needs and for sound painting advice, we hope you’ll stop in at Ace Paint and Unfinished Furniture. We’re happy to help with all your upcoming painting projects!

There are all kinds of wooden furniture: modern, antique and everything in between. We’ve talked about style differences, but what about how it’s made and what it’s made of? Is there a large difference between the wood furniture of today and yesterday?

Colors are so fascinating. They make us feel, they help us express how we feel. The right colors can really set the mood in a room, or on an outfit. There’s a lot to color theory and what each of the colors mean. This St. Patrick’s Day we thought it’d be fun to explore a little about green.

One of the wonderful things about good wood furniture is that it doesn’t have to be merely functional. It can be beautiful as well. We’ve seen some amazing pieces made with wood stains that are more than just furniture, they’re works of art. So if you’ve got an old table, desk or other piece of wood furniture that needs jazzed up, why don’t you consider using some of our great stains to try one of these ideas.

What's your furniture style? Here’s a few of the more popular styles and the kind of look they give your home.

Wood is our most basic raw material used for creating furniture. Wood furniture is timeless, and the aesthetic options are endless. Let’s talk about a few today, shall we?

The 2010s saw an uptick in modern interiors, bringing in clean lines to decor and furniture, so what does the new decade have in store? Restyle your home for the new year with the latest trends.

Are they bright and bold? Wild and wacky? It’s a thrill for our industry to learn what the latest “in” colors will be each year, and they never disappoint. The color trends for 2020 include shades of green, blue and pink, and each have an inherent welcoming quality.

Holiday parties are part of the magic of the season, but the cleanup is a pain—especially when furniture is involved. Prevent disasters with a few tips on how to protect your furniture during holiday parties.

The holiday season has arrived, and soon every corner will be decked out in red and green. But have you ever stopped to think about what holiday colors mean?

Restaining an old piece of furniture with a new varnish color can go a long way, but first you need to remove the old stain color.