You Can Make Homemade Stain Using Walnuts!
Sam Lutz • December 9, 2014
With the green movement well under way, natural products are very popular these days. Many people are choosing natural alternatives for many things, and this has led to an increased interest in natural stains. One particularly attractive option are natural stains made from walnuts. Making these stains is easy enough that just about anyone with the right materials can do it. Woodworkers in particular may enjoy making dyes for home made carpentry projects.
Dye Making Process
Materials:
- Latex Gloves
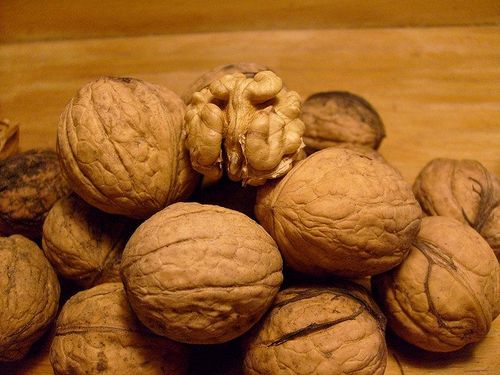
- 15 Walnuts Inside Their Husks
- Stainless Steel or Enamel Ware Pot
- Stove
- Arge Plastic or Metal Spoon
- Large Jar
Process:
- Put on your latex gloves. Protecting the skin on your hands is important because walnut husks can dye your hands a dark brown color for days or even weeks after this process is finished.
- Remove the husks from the walnuts. This can be done fairly easily with your bare hands. Alternatively, you can also remove the husks by crushing the walnuts on a firm surface like a tree stump. Be aware that anything you crush the walnut husks on will be dyed a dark brown, and could potentially be scraped or nicked in the process, so avoid doing this on furniture or other surfaces that you wish to protect.
- Place the husks inside the stainless steel pot.
- Fill the pot with 1 gallon of water.
- Place the pot on the stove and bring it to a rolling boil.
- Stir the water in the pot carefully as it boils.
- Allow the water to boil for approximately one hour, remembering to stir occasionally.
- Take the pot off the heat and allow the stained water to cool down slightly.
- Separate the husks from the dyed water, using a strainer.
- Drain the dyed water into a large jar and allow it to cool down completely. Your wood stain is now ready to use.
Dye Making Process (Alternative Method)
This alternative method takes much longer but requires no heat from the stove.
Materials:
- 15 Walnuts in Their Husks
- Latex Gloves
- Large Jar
- Strainer
- Stainless Steel Bowl
Process:
- Put on your latex gloves.
- Remove the walnut husks from the walnuts. Place the walnut husks in a large jar.
- Fill the jar with a gallon of water.
- Seal the jar. Leave it to sit for two days.
- Strain the walnut husks from the stained water into a stainless steel bowl.
Resources
These resources and online tutorials will give you more information about the dye-making process.
- DIY Network: This isn’t really a tutorial, but it does include some useful information and a nice picture.
- Nature Hacks: The Nature Hacks website talks about making a variety of natural stains and dyes from products like tobacco, nails, roofing tar (and of course walnuts).
- Practical Primitive: This tutorial features step-by-step instructions and pictures as well.
As well you may find this tutorial video particularly helpful:
Whatever method you choose, we hope you enjoy making walnut stain! If you choose to make your own stain and have pictures of the process, we’d love to see them. Stop in at any Ace Paint and Unfinished Furniture
to show us. If you’re feeling a little less adventurous and don’t want to make your own stain, stop in at any one of our stores and pick up some of our commercially-made stains, which will help you to achieve a similar look in your finished product.

There are all kinds of wooden furniture: modern, antique and everything in between. We’ve talked about style differences, but what about how it’s made and what it’s made of? Is there a large difference between the wood furniture of today and yesterday?

Colors are so fascinating. They make us feel, they help us express how we feel. The right colors can really set the mood in a room, or on an outfit. There’s a lot to color theory and what each of the colors mean. This St. Patrick’s Day we thought it’d be fun to explore a little about green.

One of the wonderful things about good wood furniture is that it doesn’t have to be merely functional. It can be beautiful as well. We’ve seen some amazing pieces made with wood stains that are more than just furniture, they’re works of art. So if you’ve got an old table, desk or other piece of wood furniture that needs jazzed up, why don’t you consider using some of our great stains to try one of these ideas.

What's your furniture style? Here’s a few of the more popular styles and the kind of look they give your home.

Wood is our most basic raw material used for creating furniture. Wood furniture is timeless, and the aesthetic options are endless. Let’s talk about a few today, shall we?

The 2010s saw an uptick in modern interiors, bringing in clean lines to decor and furniture, so what does the new decade have in store? Restyle your home for the new year with the latest trends.

Are they bright and bold? Wild and wacky? It’s a thrill for our industry to learn what the latest “in” colors will be each year, and they never disappoint. The color trends for 2020 include shades of green, blue and pink, and each have an inherent welcoming quality.

Holiday parties are part of the magic of the season, but the cleanup is a pain—especially when furniture is involved. Prevent disasters with a few tips on how to protect your furniture during holiday parties.

The holiday season has arrived, and soon every corner will be decked out in red and green. But have you ever stopped to think about what holiday colors mean?

Restaining an old piece of furniture with a new varnish color can go a long way, but first you need to remove the old stain color.