Smooth & Remove A Popcorn Ceiling
Sam Lutz • January 29, 2015
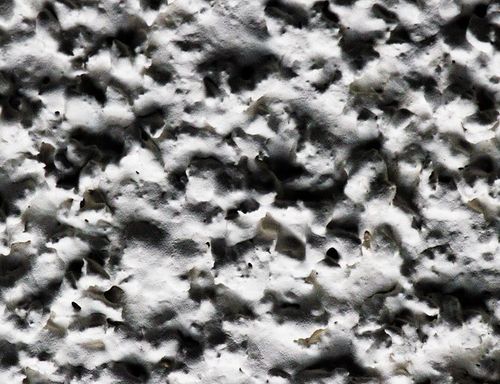
Popcorn ceilings were all the rage back in 1980, but not today. Fortunately, popcorn texture is easy to remove from many homes. Homeowners hoping to remove their popcorn ceilings are best off trying to do so before moving into the house, because the removal process involves soaking the ceiling with water.
Before you begin, it’s important to note that asbestos was banned from ceiling treatments in 1978. If your ceiling dates back to 1978 or earlier, have it tested for asbestos before attempting to remove it. If your popcorn ceiling is made of asbestos, professional abatement services will be required.
Materials:
- Tarps
- Painter’s Tape
- Screwdriver
- Electrical Tape
- Newspaper
- Bug Sprayer/Water Sprayer/Garden Sprayer
- Face Mask
- Safety Goggles
- Plastic Bag
- Ladder
- Texture Scraper
- Plastic Baggie
- Putty Knife
- Pole Sander
- Drywall Mud
- Disposable Container
- Ceiling Primer and Paint
- Paint Brush
- Paint Roller
Process:
- Remove all furniture from the room.
- Spread tarps out over the floor and the walls. Tape the tarps to the floor and walls using painter’s tape.
- Turn off the circuit breaker that supplies power to the room, if the room has a ceiling fan or light fixture on the wall that needs to be removed.
- Remove light fixtures and ceiling fans from the ceiling. Use electrical tape to tape off any exposed wires in the ceiling. Stuff the hole with exposed wires inside using a rolled up newspaper inside a plastic baggie. This will prevent the wires in the hole from getting wet.
- Spray down the ceiling using a gentle mist of water from a garden sprayer or bug sprayer. You may either spray down one small section of the ceiling at a time, or spray down the entire ceiling. Three coats of water should be enough. You’ll know when the ceiling is wet enough because the texture will become thick and pliable, similar to oatmeal.
- Stand on the ladder and use the texture scraper to gently scrape the popcorn texture. Start in the middle of the ceiling and work your way out to the edges. Some texture scrapers come with clips that can attach a plastic baggie to the scraper. This baggie can be used to capture the popcorn texture before it falls to the ground. If you have such a scraper, be sure to attach a plastic baggie before beginning the process.
- Use the putty knife to scrape the texture from the edges of the ceiling.
- Allow the ceiling to dry for 24 hours.
- Use a pole sander to sand down any scratches or gouges in the ceiling.
- Mix drywall mud in a disposable container, then use the putty knife to fill in any holes in the ceiling. Wait for the drywall mud to dry according to the manufacturer’s instructions.
- Sand any rough edges on the patches of drywall mud.
- Paint the ceiling with a coat of ceiling primer, and wait for the primer to dry for the manufacturer’s recommended amount of time.
- Paint the ceiling with a coat of ceiling paint.
- Re-install the ceiling fan and light fixture.
Voila! That’s how you remove a popcorn ceiling. For more information about removing a popcorn ceiling, check out these websites:
Many of the tools for this project can be found at Ace Paint and Unfinished Furniture, so if you’re planning to take on this project, stop in to pick up supplies. We’re happy to help in anyway we can.
One of the wonderful things about good wood furniture is that it doesn’t have to be merely functional. It can be beautiful as well. We’ve seen some amazing pieces made with wood stains that are more than just furniture, they’re works of art. So if you’ve got an old table, desk or other piece of wood furniture that needs jazzed up, why don’t you consider using some of our great stains to try one of these ideas.

