Make Laminate Countertops Look Like Concrete
Sam Lutz • January 13, 2015
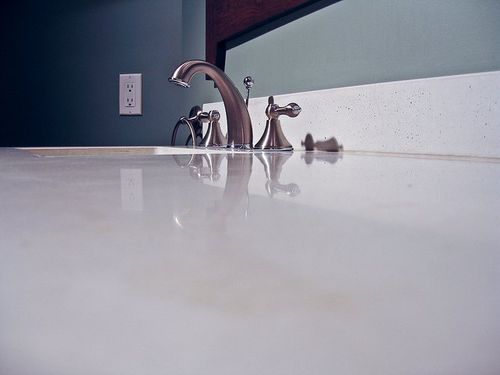
Laminate countertops might have been the hot thing in 1975, but times have changed. These days, a lot of people are looking for ways to transform their old laminate countertops into something new and different. In this tutorial, we'll walk you through the step-by-step process of turning your laminate countertops into concrete.
Materials:
- Rags
- Mild Soap
- Medium or Coarse Sandpaper
- Painter's Tape
- Disposable Mixing Cups
- Disposable Stirrers
- Ardex Feather Finish
- Concrete Sealer
- Paintbrush
Process:
- Clean the countertops with rags and warm soapy water.
- Dry the countertops after cleaning.
- Sand the laminate countertop to create a rough surface that the concrete can bind to. The type of concrete that we recommend you use in this tutorial is supposed to be able to bind to surfaces without scoring, but this step is still a good idea.
- Apply painter's tape to the wall around the countertop to protect it from the concrete.
- Remove the sink. This step is optional but recommended. The method you use to remove your sink will depend on the way it's attached to the countertop, whether or not your sink has a garbage disposal, and other factors. Check out this page for a helpful tutorial about the sink removal process.
- Mix your concrete in the disposable cups using a ratio of 1 part water to 2 parts concrete. Mix your concrete in small amounts to prevent the concrete from drying before you're able to use the entire mixture.
- Spread the concrete mixture onto the countertops using a drywall knife, putty knife or trowel. This process is like spreading peanut butter on bread. Spread the concrete over the countertop evenly and thinly, so that you can't see the laminate through the concrete.
- Allow the concrete to dry for 24 hours.
- Use medium sand paper to sand down the parts of the concrete that are sticking up higher than other parts. Sand the other parts of the countertop to rough up the surface.
- Apply a second layer of concrete to the countertop, in a manner similar to the first layer.
- Allow the second layer of concrete to dry for 24 hours.
- Sand down the second layer of concrete, addressing any parts that are uneven and roughing up the rest of the surface so it will bind to the third layer of concrete.
- Apply a third layer of concrete.
- Allow the third layer of concrete to dry for 24 hours.
- Sand down the concrete to get rid of any high parts. You may apply more layers of concrete if you like. Three or four layers is typical.
- Seal the concrete using a paintbrush as soon as your final layer has been dried and sanded.
Note:
The more you sand the concrete, the less textured your countertops will be. Some people like to leave the texture and trowel marks in their concrete, however, it's important to note this could potentially make the countertops difficult to clean.
So there you have it! For more information, check out these tutorials:
If you've recently completed this project, we'd love to hear from you! Tell us if you have any suggestions or tips that would make this process easier. And, if you're in need of trowels, paintbrushes, mixing cups and more, residents of the Pittsburgh area can stop by Ace Paint and Unfinished Furniture. We're here to help!

There are all kinds of wooden furniture: modern, antique and everything in between. We’ve talked about style differences, but what about how it’s made and what it’s made of? Is there a large difference between the wood furniture of today and yesterday?

Colors are so fascinating. They make us feel, they help us express how we feel. The right colors can really set the mood in a room, or on an outfit. There’s a lot to color theory and what each of the colors mean. This St. Patrick’s Day we thought it’d be fun to explore a little about green.

One of the wonderful things about good wood furniture is that it doesn’t have to be merely functional. It can be beautiful as well. We’ve seen some amazing pieces made with wood stains that are more than just furniture, they’re works of art. So if you’ve got an old table, desk or other piece of wood furniture that needs jazzed up, why don’t you consider using some of our great stains to try one of these ideas.

What's your furniture style? Here’s a few of the more popular styles and the kind of look they give your home.

Wood is our most basic raw material used for creating furniture. Wood furniture is timeless, and the aesthetic options are endless. Let’s talk about a few today, shall we?

The 2010s saw an uptick in modern interiors, bringing in clean lines to decor and furniture, so what does the new decade have in store? Restyle your home for the new year with the latest trends.

Are they bright and bold? Wild and wacky? It’s a thrill for our industry to learn what the latest “in” colors will be each year, and they never disappoint. The color trends for 2020 include shades of green, blue and pink, and each have an inherent welcoming quality.

Holiday parties are part of the magic of the season, but the cleanup is a pain—especially when furniture is involved. Prevent disasters with a few tips on how to protect your furniture during holiday parties.

The holiday season has arrived, and soon every corner will be decked out in red and green. But have you ever stopped to think about what holiday colors mean?

Restaining an old piece of furniture with a new varnish color can go a long way, but first you need to remove the old stain color.