Blog Layout
How To Build A Fence Using Wood Pallets
Sam Lutz • July 7, 2015
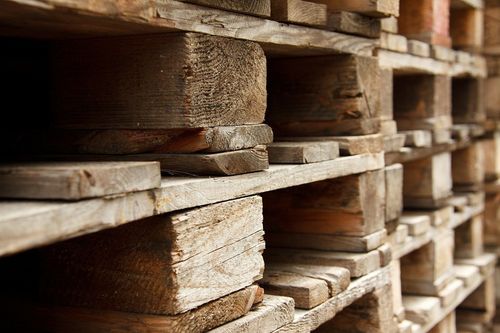
It’s summer. It’s time to build things, make things with your hands, and work outdoors. If you’ve got “build a fence” on your To Do list this summer, this project is for you. Using wooden manufacturing pallets, you can build a sturdy and attractive fence for use in all areas of your yard. This step-by-step tutorial will help you construct that enclosure around your garden or pet’s play area that you’ve been meaning to install. Best of all, this project can be done basically for free!
A Word to the Wise
The thing you need to understand about this project is that there really isn’t one right way to put it all together. The way you make your fence will depend on the topography of your land, the position of other structures on your land and the size of the fence. We’re going to outline a couple different ways that you can follow to build your own pallet fence, but we want to emphasize that you need to find the best method that works for you. You may have to improvise as you go. There’s nothing wrong with that.
Get Started by Gathering Pallets and Other Materials
To get started on this project, you’re going to need to gather wooden pallets (possibly quite a few, depending on the size of your fence). Pallets are available for free at many stores that receive warehouse shipments. The best place to look are small mom-and-pop hardware stores, home improvement centers and lawn and garden supply places. Many stores have pallets available for free and will throw them away if no one claims them. Ask store clerks or managers if they have any to spare. Look for pallets that have no chemical spills or similar damage.
Besides the pallets, you’ll probably need a hammer, nails, screws and a drill. Of course, as mentioned before–you’re going to be improvising. You may end up needing more materials, or fewer materials, depending on the method you choose to build your fence.
Method 1: Constructing “H” Shapes
Picture this: you stand a pallet on its end. We’ll call this Pallet A. Take a second pallet (Pallet B) and place it on its end, perpendicular to Pallet A. Screw Pallet A and Pallet B together so they form the shape of a T. Stand up a third pallet (Pallet C) on the other end of Pallet A. Position Pallet A and Pallet C so they’re perpendicular to one another, then screw the two pieces together. Altogether, these three pallets will form an H shape that stands on its own.
Pallet A forms the first segment of your fence. Pallets B and C are supporting pallets that will prevent Pallet A from falling over. To make the wall longer, stand a fourth pallet on its end and point it in the same direction as Pallet A. Screw that fourth pallet to Pallet B, on the opposite side of Pallet A. Repeat this process on the opposite side of Pallet C. Keep going like this, screwing criss-crossing pallets together to form the first wall of your pallet fence. This process has been described and documented here.

Method 2: Sandwiching Pallets Between Two Existing Structures
Supposing that you simply want to build a fence that stretches between your house and your garage, or two other similar structures, the easiest thing to do is attach the pallets to the structures, and let the larger structures hold the pallets up. Don’t screw a pallet directly into the wall of your house. Instead, screw supporting boards into the exterior wall of your house, and then screw the pallet into that supporting board. Each additional pallet will be attached to the first pallet.
This method probably wouldn’t work for a very long fence. For a longer fence, use the supporting pallet method described above.
Method 3: Attaching Pallets to One Another Using Wooden Strips
Using whatever means necessary, whether that’s by attaching pallets to supporting pallets or by attaching pallets to a structure at either end, stand up your pallets to form your fence. Attach them to one another by screwing wooden strips at the edges of each pallet. You can see this method described in the video below:
You might have some leftover pallets once your fence is constructed. You can make all kinds of things from pallets, not just fences. This website shows you a few things you can do with those leftovers, and also describes some of the best methods for finding free pallets.
When all is said and done, you may want to paint or stain your pallet fence to help it last a little bit longer. If that’s the case, stop in at Ace Paint and Unfinished Furniture. And bring pictures of your fence, while you’re at it! We’d love to see how your project turns out.
Share
Tweet
Share
Mail
By Chris Vendilli
•
March 16, 2020
Colors are so fascinating. They make us feel, they help us express how we feel. The right colors can really set the mood in a room, or on an outfit. There’s a lot to color theory and what each of the colors mean. This St. Patrick’s Day we thought it’d be fun to explore a little about green.
By Chris Vendilli
•
February 24, 2020
One of the wonderful things about good wood furniture is that it doesn’t have to be merely functional. It can be beautiful as well. We’ve seen some amazing pieces made with wood stains that are more than just furniture, they’re works of art. So if you’ve got an old table, desk or other piece of wood furniture that needs jazzed up, why don’t you consider using some of our great stains to try one of these ideas.
Promotion Sign Up
Complete the form below to sign up for our promotions
Contact Us
Thank you for contacting us.
We will get back to you as soon as possible.
We will get back to you as soon as possible.
Oops, there was an error sending your message.
Please try again later.
Please try again later.
Contact Details
Mt. Lebanon: 294 Beverly Road,
Pittsburgh, PA 15216
McMurray:
3339 Washington Road,
McMurray, PA 15317
Follow Us
© Copyright 2019 | All Rights Reserved

